Croissants

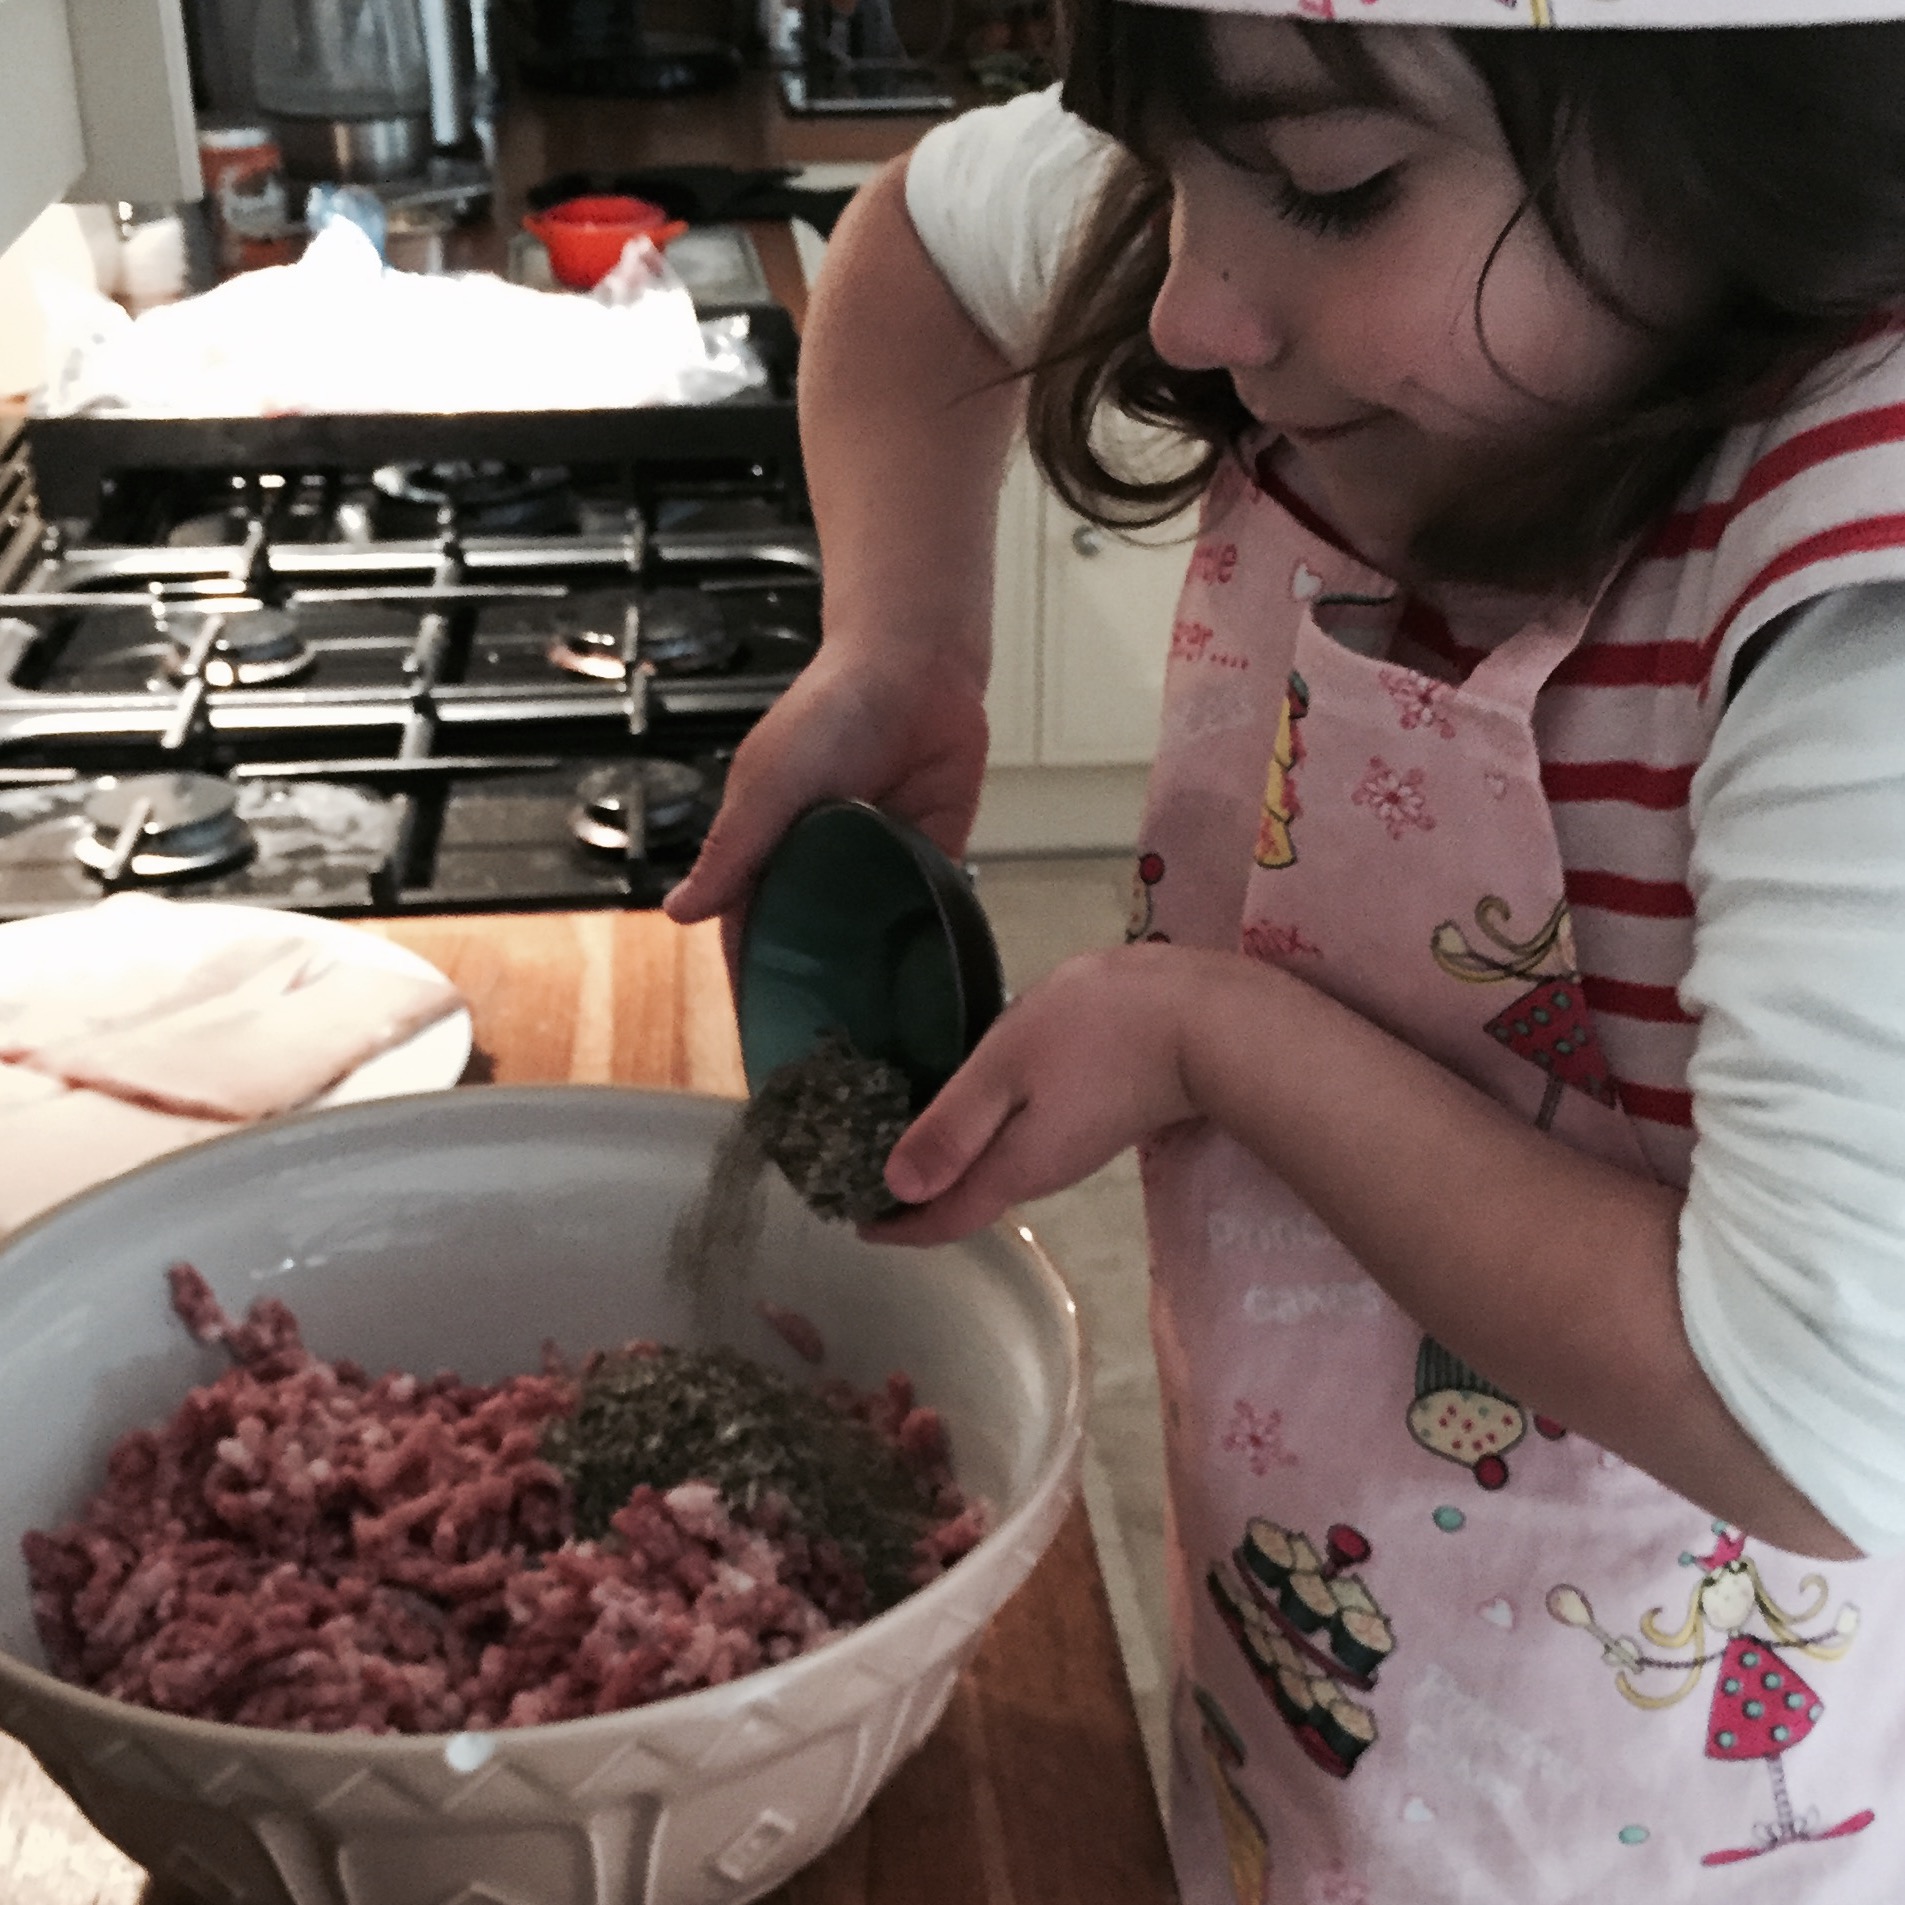
Making your own Croissants may seem a little mad and they do take us two days (not whole days) to do, but Regan enjoys this variant on bread making, as they have a few more ingredients and she can also do some bashing with a rolling pin!

Whilst our recipe will surely be the same or at least similar to many croissant recipes, we’ve simplified the process to allow a 5 year old to follow.. I’m not trying to be patronising and of course the 5 year old will need supervision, guidance and help, except for with the bashing part, as I’m sure like Regan most will enjoy bashing!

Ingredients: 500g Strong white Flour; 10g Salt; 50g of Caster Sugar; 10g Yeast; 125ml of (lukewarm) Water; 125ml of cold milk; 1 Large Egg; 200g of Unsalted Butter.

Method: Add the Flour, the Salt and the Sugar to a mixing bowl and on a low setting allow these to mix in. Put the yeast into the lukewarm water and allow to bubble a little. Add the Cold milk and the egg in to the flour mix and allow to mix in, then add the water yeast mix.

This method is slightly different to others I’ve read, but it works well and in my mind means the yeast is activated, and not being killed or stunted by the salt or coldness of the milk and egg.

Let the croissant dough knead for around 8 mins, and then shape in to a ball, and put in a lightly flour bowl. Cover with a tea towel or in our case a see-through disposable shower cap and put in the fridge for at least 2 hours, or up to 24 hours. We do the first bit of this on a Saturday morning and the 2nd bit Saturday afternoon so we have Croissants for Sunday breakfast. It’ll all start to make sense soon…

Whilst the dough is slowly proofing in the fridge, we get the butter bit ready. If you take the 200g of butter straight from the fridge and put it either between two pieces of clingfilm or a split open freezer bag, then bash, bash, bash the butter with a rolling pin and roll it to around 1cm depth. Keeping it in between the clingfilm or freezer bag put back in the butter in the fridge again. Now you have time to tidy up and go for a Saturday morning walk whilst we wait for the next stage.

Once you’ve waited the 2 hours or more take the dough out of the fridge and gently roll it out in to a square shape, I say gentle as we don’t want to force all the air out but we do want to roll it out big enough for the butter to be added.

Take the butter from the fridge and gently place in the middle of the dough and fold the dough over to envelope the dough. Fold in half and again gentle roll out the croissant dough gently again, this time in to a rectangular shape. Cover again, we use the split freezer bag and put back in the fridge for around 30 minutes.

After 30 mins we taken the dough out of the fridge again and on a lightly floured surface roll it out gently lengthways and fold it in to thirds, and return to fridge for another 30 minutes.

We are going to do the above bit one more time… roll out, fold in to thirds and put back in the fridge for another 30 minutes. I know it seems a lot of faffing for something you can simply buy, but don’t underestimate the fun your 5 year old (or older) is having and they do taste very, very nice!

Now after the 30 minutes has past we take out the dough and roll out in to a rectangle 30cm x 75cm and around 4mm in thickness. With a sharpe knife trim the top, bottom and sides so you have a perfect rectangle. We then carefully, cut the rectangle lengthways and then cut each rectangle strip in to triangles. You want each triangle to have a bottom of 9cm and each side around 15cm, each an isosceles triangle. You’ll get 6-7 triangles from each strip, so 12-14 small(ish) croissants. Of course, the dough mix will be fine for bigger croissants, just remember to keep the triangles as isosceles.

Make a tiny cut on the bottom of each triangle (side b), this will help you get the shape, the cut should be around 2cm. Roll up each triangle from the bottom, pulling very gently to allow the spit you’ve made to open.. don’t be rough at this stage, you don’t want to crush the dough. If you do this bit right, it should un-roll pretty easily, not that you want to un-roll it.

Allow to prove for another 1-2 hours, this time at room temperature, covered with a tea towel. If we are going to freeze any, we freeze them at this point (see later).

Preheat the oven to 200C and glaze the finished croissants with egg wash. If you prepare the egg wash with a pinch of salt an hour before you use it, it works best we’ve found. Lots of bakers and chefs suggest this when doing an egg wash and it works well. Place on a greased baking tray, allow enough space for the croissants to rise.

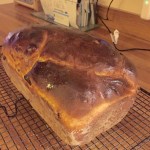
Glaze again with the egg wash before putting in the oven for 15-20 minutes or until golden brown. Keep an eye on them baking, the time it takes does very much depend on your oven.

Cool on a wire rack. You can be a bit tidier than we are with the glazing, but don’t be too precious, remember this is cooking with a 5 year old.

Of course, you could do this final stage by getting up at silly o’clock for fresh Sunday morning croissants, but if you do them ahead on the Saturday they reheat in a warm oven in under 5 minutes. They also freeze well either at the pre-cooking stage or once made… we freeze before the final proof, but remember that takes longer in the morning, as they’ll need to defrost and then go through the final proof before baking.

You can add Almond Paste to these before you roll them, putting a blob of paste above the split you’ve made on side b of the triangle and top with flaked almonds and icing sugar before baking which I love! Or for a simple chocolate breakfast treat, cut the croissant dough in to squares and roll with a pieces of dark chocolate for a simple Pain au chocolat, which is a favourite with Regan’s Grandma.

As always, let me know how you get on…

Fruit Loaf

As you may know or guess, I’m a big fan of bread, real bread, the simple ingredients  of Flour, Water, Salt and Yeast, yet I also love a sweet dough bread, whether that is a brioche bun for our burgers, or in this instance a yummy fruit loaf.

The fruit loaf, goes by many regional names, and this recipe my mum used to call a plum bread. It is basically a sweet dough, with sultanas, so in reality it is a grape bread, maybe?

There are a few more ingredients in the Fruit Loaf, which means Regan has more weighing and measuring to do…

Ingredients: 500g Flour; 10g of salt; 40g of Caster Sugar; 60g of Unsalted Butter; 250ml of lukewarm milk; 200g of Sultanas; 15g of Yeast; 3 Medium Eggs or 2 Large Eggs, plus 1 egg for the egg wash.

Method: We weigh the flour, the salt, the sugar and put it in the bowl for the KitchenAid dough mixer and switch on to a low setting.

We warm the milk in the microwave on full power for 1 minute, you want it warm, but not too hot that you can’t put your finger in it. We then add the yeast and the sultanas to the milk and leave for 5-10mins, for the fruit to plump up and the yeast to bubble.

Whilst we are waiting for the yeast and sultanas, we add the unsalted butter to the flour, salt and sugar in small pieces, so we finish with a crumb type texture. We then add the milk, yeast, sultanas in to the dough bowl keeping the dough mixer on a slow speed, finally add the eggs, to the mix and let the dough knead for 10 minutes on a slow speed.

The dough is wetter than a normal bread dough, but you want to be able to handle it, so carefully add a little more flour if the mix is too wet. As you will know from our other bread recipes, Regan likes to hand knead the dough, so we empty the dough on to a clean work surface and she folds, stretches and presses the dough for another 5 minutes. The keen eyed will notice that ‘Elsa’ from frozen was my assistant yesterday!

We then put the dough in a lightly greased bowl, we use a teaspoon of rapeseed oil to grease the bowl, and leave to proof for one hour, covered with a tea towel, or as we use a clear disposable shower cap.

After one hour, return to the work surface and gently knock back the dough and shape it. This time we put it in a loaf tin, but you can experiment with a different shaped loaf, maybe plaiting it?

Second proof for another 45-60 minutes whilst the oven is getting to temperature (set the oven to 220C). Whilst waiting, mix one egg with a pinch of salt and mix ready for the glaze.

Glaze with the egg wash just before putting in the oven. Turn the oven down to 170C/180C (depending on your oven) just before you put the bread in and bake for 20-25 minutes.

Cool on a wire rack and serve with butter, or maybe butter and cheese. It is also, very tasty toasted and whilst we don’t often, or should I say never have left overs, it would work well in a bread and butter pudding.

Enjoy x

Cake

It’s been a few weeks since our last blog, with a lot going on at home we’ve just not had the time. We have of course been cooking and baking but not had the time to write up what we’ve been up to.

Today however is Grandad’s birthday and Regan wants to make a cake to take round. We don’t eat a lot of cake, it is normally limited to birthday time, that said we LOVE cake!

I can’t take the credit for this recipe and unfortunately I can’t give credit, has despite lots of googling, I can’t find where we got it from! I’ll add a credit later if I find where we got it from. The recipe is a good one, so it would be a shame if I don’t give the credit correctly.

Anyway, this is also a good one for baking with kids, as it is simple and all about weighing rather than measuring.

Ingredients for cake: 4 eggs; caster sugar; softened butter; self-raising flour; 1 tsp baking powder;  up to 2 tbsp milk.

You’ll notice I have put measurements for the sugar, the butter or the flour. Whatever the eggs weigh in their shells, this is the weight you want for each of these ingredients, so for example if the eggs in the shells weigh 251g, then you want 251g of caster sugar; 251g of softened butter and 251g of self-raising flour. Eggs vary in weight so weighing them ensures you get the right balance. I always find cooking in general allows more expression and experimenting as you can vary flavours and ingredients, but baking is more of a science and you need to follow a recipe that works.

Method: Put the sugar and the butter in to the KitchenAid stand mixer, or if you wish you can cream these together with a fork. You need to get the butter and sugar to a smooth  and nearly white in colour. you can then add the eggs and the flour and the baking powder using a tablespoon a little at a time to ensure it mixes well. We sometimes add a drop of vanilla essence to the sponge mix. The milk is used to let the mix out a little so add carefully. You want the sponge mix to be a dropping consistency but not too runny!

With a spatula empty the sponge mix equally in to two 20cm round well greased cake tins. The ones with the removable bottoms are best. You can weigh each tin with the mixture to get each the same. Give the tins a knock on the work top to level and bubbles in the sponge mix, as you don’t want holes in the sponge.

The other thing this recipe differs to others is the baking. Most sponge recipes suggest setting the oven at 180C and baking for 20mins, with this one we bake at 140C for 35-40 mins. Set the timer for 35 mins and check with a skewer which should go in to the sponge and come out clean.

Cool on a wire rack and then add the filling.

The filling can vary to taste, but a good always popular choice in our home is good quality jam and whipped fresh cream! In the summer we add fresh British strawberries sliced.


Steak

It’s been a while since we’ve posted a blog on bread with dad, and my apologies for that. With moving house and exploring moving countries it has been a little hectic here!

Those of you have read any of my books will know of my love of France, and it is on this exploration trip of living here permanently myself and Regan have been testing steak.

Getting a correctly cooked steak is pretty consistent these days, even in the UK, so exploring the different degrees of ‘doneness’ is a fun thing to do with your 5-year old (she tells me she’s five and a HALF). What we also do is explore and teach the different cuts of beef and how to prepare the different cuts to make the tastiest steak.

We’ve probably all tried Filet Steak, Sirloin Steak and Rump Steak and most likely T-Bone or Rib-Eye Steak, but many I’m guessing don’t delve deeper and discover the tasty cheaper cuts. In France, mostly you see Entrecôte – Fore rib steak; Faux-Filet – Sirloin steak with a different name in each English speaking country; Filet – Fillet, tender, juicy, expensive in most countries. We like Bavette – Flank steak and  Onglet – Hanger steak which are very tasty cuts and usually can be bought at bargain prices.

Today we’ve used Onglet, which has a similar texture to Bavette in that it is of a feather like texture and is full of flavour whether cooked rare; medium; well-done or somewhere in between, or should I say Bleu; Saignant; À Point –  Perfectly cooked; Bien Cuit – Well done. In France that is a medium to well-done steak; it will still be pink inside, or Très Bien Cuit – An exceptionally well-done steak; however, “très bien cuit” is not in any French chef’s dictionary though it will be clearly understood. Do not order France’s popular Steak Frites very well-done as that will bring you fried or grilled leather.

As with all steak cooking, or beef cooking in general, you want the beef to be at room temperature so take it out of the fridge well before cooking time. With bavette and Onglet we give it a bit of a bash with a meat tenderising hammer (Regan likes doing this), we then drizzle a little oil and grind a little pepper, we then leave until ready to cook before grinding a little salt on each side.

I’ve read a few chefs/cooks who suggest oiling the pan rather than the meat, but with these cuts I find oiling the beef early on helps tenderise the beef. If we’re doing filet steak I do add a little oil and butter to the pan so I can baste the steak towards the end of it’s cooking time, as a nicely glazed crust gives great flavour!

For the Onglet, before cooking we’ve blanched off some green beans (haricot vert) as we’ll toss these in butter and garlic whilst the steak rests.

Get the pan you’re going to cook the steak in, hot and then turn the heat down a little, grind the salt on to the steak just before adding to the hot pan and cook for 3 minutes each side. We tend to leave the steak for 3 minutes each side, but we have tried the turn every 1-minute and it works fine too, I guess I’ve just done it this way for too long and no point in fixing something that isn’t broke!

Once cooked, rest the meat for at least 2-minutes on a plate that will collect the juices, as we pour these over the steak before carving and serving. We always slice the steak with a sharp knife to serve, but that is not compulsory.

While the steak is resting pop the green beans in to boiling water for a couple of minutes and in a frying pan heat some butter and olive oil, with thin slices of garlic and salt and pepper. Drain the beans and toss them in the frying pan to coat them before serving. YUM!

Serve the steak and beans and enjoy!


Lincolnshire Sausages

FullSizeRender-4FullSizeRender-6IMG_5483IMG_5486

Sausages are a little controversial these days, especially after the recent health announcement regarding processed meats, yet along with many other processed foods, it is my opinion that it could very well be all the additives/preservatives that are the issue. Just like other foods Regan and I prepare or cook, if we know what goes into something we all feel better about eating it. Of course, whether it is healthy or not is beyond my study level, but knowing exactly what goes in to your food makes it taste better.

Making things when you get your hands in, is always fun for kids, well it certainly is when Regan gets her hands dirty! Having a bowl in the sink ready prepared is always a good idea to ensure any sticky mess from food preparation doesn’t finish all over the kitchen!!

My Dad was a butcher way back in the olden-days so I’ve helped and been making sausages for a while, and pre-Regan I would make traditional Lincolnshire sausages. We still make Lincolnshire sausages, but we don’t always make them sausage shape these days. We make square flat sausage patties and we make round burger style sausage patties, along with traditional style. The point I’m making here, is that filling casings with the sausage meat whilst a skill she will improve soon (hopefully), she gets a little frustrated when the casings burst or don’t fill evenly (I’m sure she’s picked that frustration up from me… of course she has!), so if you or your kids aren’t ready for filling the casings/skins, then don’t be put off, you can still give sausage making a go.

Getting the sausage recipe right, which ever finished product you go for is the most important thing and without doubt having fun with your kids whilst making them is of course, is really what it is all about!

Mincer/grinder or food processor will do the job of grinding the meat. I use a semi-professional mincing machine an Inox No.8  Electric 220/50 Mincer but you can get many different, and cheaper home models or food processor attachments.  Whichever, you choose, be aware that these things like many things in a kitchen are dangerous and supervision of your child/children is paramount!

Buying your ingredients, well your meat is often cheaper and mostly better if you have a good butcher nearby. I know supermarkets are convenient, but pork needs to taste of something like say pork, and I’ve found all too often that supermarket pork doesn’t taste like pork! Clearly, only my opinion, but given the option use a good butcher.

Just like my other recipes when preparing food/ cooking/ baking with Regan I try and keep the measurement relatively simple so we can practice her maths (sums) too. My sausage recipe makes around 20 ‘proper’ sausages, and if we’re making burger style patties, we get around 12 from the mix. May I add, a Lincolnshire sausage ‘burger’ on mine and Regan’s Brioche Buns is an extremely tasty take on a sausage butty!

Ingredients: 1kg Pork Shoulder; 500g Pork Belly; 20g of Salt, 3g of White Pepper; 10g of Sage; 200g of Rusk (or breadcrumbs), 200ml of Iced Water.

I’ve seen ‘Lincolnshire’ sausage recipes with mace or nutmeg and other spices, and I have tried them, but in my opinion, keeping it traditional works and tastes best. You can also adjust the salt, pepper, sage to taste of course. If you’re using fresh breadcrumbs, bake them first to kill off any yeast, you don’t want the yeast reacting with the meat. Gluten free sausage rusk is available these days, which works as a good alternative too.

We did make sausages when Regan was 3yrs old make sausages using the pork and just added a packet of sage and onion stuffing mix and 100ml of water, which was certainly simple and tasted ok, but not as good as these tasty sausages! Plus, now she understands that she is from Lincolnshire, it would be wrong not to make Lincolnshire Sausages!!

Method: Whether, doing this on your own or cooking with kids, I find measuring everything out and prepping the meat ready for mincing is always best. I still do the majority of cutting the meat in to sizes ready for the mincer, but I do let Regan get involved with a sharp knife. We’ve found a clever little shield to protect her fingers which we found in France, made by Opinel and they also do kid friendly kitchen knives. Still caution and supervision is needed, but getting her involved is what bread with dad is all about. Anyway, remove the rind/skin from the pork shoulder and pork belly and chunk up the meat to fit through the mincer. If you remove the skin carefully, you can make naughty treats of pork scratchings!

Careful mince the meat with a medium plate (this should be a rough mince not a fine mince) ensuring little hands don’t stray anywhere near the moving parts into a good size mixing bowl, the classic cane mixing bowl or similar works well. Add the seasoning and rusk, and get your hands in to the mix ensuring all the seasoning is distributed throughout the meat. Add the water a bit at a time, you don’t always need the full amount. I’ve used beer or cider instead of water which works really well, but again, that is not the traditional Lincolnshire way.

I’d recommend covering the bowl with cling film and putting in the fridge overnight, or at least for a few hours. The sausages will taste better if the seasoning is allowed to permeate the meat throughly.

Before, we are happy to make the sausages in to traditional style Lincolnshire sausages, or burger style patties, it is a good idea to give them a test. Make a small patty from the mix and fry in a pan to sample for taste – then adjust the seasoning accordingly, if needed.

If we are making traditional sausages, we use hog casings/skins which give an authentic taste. If we are doing the hamburger style patties we use a hamburger press to form the patties, but you can do this by hand. Either method for the burger style sausages, we mould in to a ball and then flatten with either our hands or the burger press. Each ‘burger’ is made around 5″ in diameter and weight 4-6oz. Clearly a 4oz patty will cook quicker. We tend to use 28mm cases for traditional sausages but you can make thinner chipolatas if you prefer.

Stuffing the sausage skins is fun, either with your 5 year old or on your own, when I say fun of course and like I mentioned earlier,  it can also be frustrating and annoying, but mostly fun. We use an attachment for our  Inox No.8  Electric 220/50 Mincer but you can buy simpler manual options. A quick search of Manual Sausage Stuffer on the internet will come up with a decent option I am sure.

Linking sausages is a good skill to learn, and whilst difficult to explain in words, there are several useful videos on YouTube. Search how to link sausages and choose a video that suits you. Be prepared to make mistakes and split the casings/skins on your first attempt, but persevere, it is worth it, and serving your own proper sausages at a BBQ is very rewarding in a smug satisfaction way.

We do make other sausages and sausage products. Homemade Sausage Rolls are something special, and our take on what I call a mix between a Toulouse Sausage and a Breakfast Sausage makes a great mid-week tea/dinner with either Potato Dauphinoise or Aligot. I must make up and trademark a name for our version.

Ingredients for our ‘Toulouse’ adapted sausage: 1.5Kg Pork Shoulder; 400g of Pork Belly; 100g of Smoked Lardons (or thick bacon); 15g of Brown Sugar; 25g of Salt; 1 teaspoon of white pepper; 3-4 cloves of Garlic (chopped) and 150ml of Chilled Cider (you can just use chilled water if you prefer). The Method: Same as per above, except use a course mincing plate, as you want it to be coarsely minced.

I always use our Lincolnshire Sausage recipe for Sausage Rolls, but we do vary between short and flaky pastry. I prefer shortcrust pasty for sausage rolls, my wife Lisa prefers flaky and Regan will eat and loves both. I like to add a little Parmesan cheese to my pastry mix which ever we do when making Sausage Rolls. Around half a tablespoon of grated Parmesan to your pastry mix adds something extra without making it too cheesy. Give it a try and let me know what you think.

I’ll cover the Lincolnshire sausage ‘burger’ on mine and Regan’s Brioche Buns in a future post.. Keep checking back for the Brioche recipe.

NB: As per previous blog posts, equipment used is purely through personal preference and no recommendations are made or endorsed. This blog doesn’t make me any money (although I wish it did).

Pizza

The title Pizza sells this pizza a little short.. this pizza is the ‘BEST’ pizza!

We go back nearly a year when Regan and I first made pizza together, so she had just turned four. We of course have bought pizza from famous pizza restaurants and takeaways but making your own is much more fun and if you use this recipe it is much, much tastier.

Now, without demeaning any pizza favourites you may have, pizza started it’s life as a peasants food, and because of this, it is a simple food. I’ve read the word “pizza” is thought to have come from the Latin word pinsa, meaning flatbread (although there is much debate about the origin of the word, so don’t quote me). We want to taste the ingredients and with the best will in the world a fully loaded pizza may taste ok, maybe even good, but you’re not tasting the ingredients as such, so my recommendation on top of the tomato and mozzarella cheese, use only one, maybe two toppings.

Regan and I make the dough from scratch, we make the tomato sauce from scratch, but we have yet to milk a buffalo for the mozzarella, and to-date have not made our own salami.

Before I go in to the ingredients and method, let me just go through a few options and no-nos. I prefer to make the pizzas on a pizza peel, and transfer the made pizza to a hot pizza stone in a very hot oven, but at 4 years old and even now at 5 years old that is a step too far for Regan’s skill set. So, we use a bought pizza screen/tray which makes it much easier for her and it works well. The ‘no-no’ is despite seeing many simple recipes for pizzas that suggest rolling out the dough with a rolling pin, this ruins the pizza in my opinion, so use your hands.

The pizza dough recipe is for a New York style pizza and is a cold proof/rise dough which is proofed in the fridge, so we have to make it at least 24 hours in advance, but best made 3-days in advance. Making the dough, if you’ve made bread before is pretty simple. Regan will often help me do the dough after school on Wednesday, to make the pizzas for Saturday. This recipe makes three 14″ pizzas, but you can alter the ingredients to make more or less (divide ingredients by 3, then multiply by how many pizzas you plan to make).

Pizza dough ingredients: 600g of Strong Bread Flour; 370g of Water (room temp); 2.7g of Yeast; 12g Salt; 6g of Caster Sugar; 2-3 teaspoons of Rapeseed Oil (or Olive Oil).

Method: Put the flour, salt and sugar into the mixing bowl. Again we use the KitchenAid with dough hook and start mixing at low speed. We weigh the water in this recipe rather than measure, I’m not sure why but we get a more consistent dough by weighing. We add the yeast to the water and allow it to start to bubble. Mix on low speed until all the flour has been incorporated. We then add the oil and allow it to continue to knead in the mixer for another 5 minutes.

Divide the dough in to four equal pieces, which will weigh around 320g, make them dough ball shape and put them in individual greased sealed containers, or greased freezer bags and seal. Put the dough balls in the fridge, for a minimum of 24 hours. I recommend the 3-days (72 hours).

One-hour before you make the pizzas, take the dough out of the fridge. If your dough is too cold it’ll bubble and blister in the hot oven, so room temperature works best.

On a floured or ideally a cornmeal dusted work surface we make the pizza shape with the dough. Remember no rolling pin, we are doing this with our hands. You want to define an edge to the pizza, not too big, but enough to keep the pizza sauce and toppings on the pizza. Using your flat finger tips, go around the edge of the pizza pressing down forming an edge around 1cm.

We then turn the dough upside down and stretch out the dough with the flat of your hands, turning and stretching until we have a round pizza shape approx. 14″ in diameter. There is a skill to this, but don’t be put off my making mistakes, trial and error can be fun as well as frustrating, but then when your cooking with a 5 year old, you have to be prepared for some frustrations. If you finish with a more rustic shape initially, it doesn’t really matter. Whilst the way we do it is slightly different (only slightly different), Diana Coutu’s video on YouTube (5 times Canadian Pizza Baking Champion) shows a good way to get the perfect pizza shape.

Pizza Sauce ingredients: 1 tin of good quality chopped tomatoes; 1 clove of garlic (crushed); 2 teaspoons of copped or dried Oregano.

Method: Make the pizza sauce in advance and put it in the fridge overnight, but just like the pizza dough, take it out of the fridge so it is at room temperature before you use it. To make the sauce, simmer the tomatoes, the garlic and the herbs (basil works well too) for 20 mins on a really low heat to infuse the flavours. Take off the heat, allow to cool a little and then blitz it with a stick blender to get a sauce consistency, we use an older version of the Braun but others are available.

Topping the pizza: Like I said earlier, less is more. This dough tastes good, the sauce tastes good, so we don’t want to over power these with a dustbin lid amount of toppings! We tend to do three pizzas, each slightly different. To be honest 3 pizzas for 2 adults and a 5-year old is too much, so I do over eat… eating through greed, rather than need, if you know what I mean.

Pizza 1: Simple Cheese and Tomato. Only use mozzarella cheese. I know you can buy all sorts of fancy cheeses and a crumble of Stilton added for top cheese works well, but lets keep things simple. We buy mozzarella in a block and grate it, but you can buy it and slice it thinly to spread around the pizza. Again don’t overload with cheese, we want to taste the dough, the cheese and the tomato.

Pizza 2: We do a Cheese, Tomato and Garlic pizza. The one difference to Pizza 1, is that we grate our homemade roasted garlic butter over the sauce, before we add the mozzarella. Regan and I make garlic butter a lot, it is so much better than bought garlic butter! It’s great for homemade garlic bread and fun to make with Regan. We roast a whole bulb of garlic in the oven wrapped in foil, cut off the top of the garlic bulb and drizzle oil over it and roast for around 30 mins at 180C. Once cool, squeeze the garlic out into a pack of butter, mix it well in with your hands (messy fun), add chopped parsley and shape in to a sausage shape. Wrap in cling film and put it in the fridge. We grate the butter on to the pizza straight from the fridge. I’ll cover garlic bread when I write about our Italian Meatball recipe another time.

Pizza 3: A copy Pizza 1, but we add Salami and 1 chopped chilli from the plant in the kitchen. These chillies are HOT, so one is plenty. Add the chilli under the salami, as it will burn in the oven if it’s on top. You could sprinkle crushed chillies if you prefer.

NB: If we’re making pizzas on the trays, the pizza dough is put on the tray before topping, if we’re putting it in the oven straight on to the pizza stone the pizzas are assembled on the cornmeal dusted pizza peel.

We cook the pizzas in a HOT oven at at least 220C for approx 6 mins. It is well worth investing in a good quality pizza wheel to cut the pizzas. We serve them on a long wooden board placed in the middle of the table and eat with our hands, the New York way, but you could serve with a knife and fork if you really wanted.

IMG_0920 IMG_5721 IMG_5722

NB: Beer NOT included for Regan, and clearly optional as an accompaniment. Additionally, as per usual no brands mentioned in this blog post are endorsed by me and we receive no remuneration for mentioning these brands.


Bread

FullSizeRenderIMG_5323

Like I’ve said, this blog is much more than Bread with Dad, but for the first blog post, it only seems fitting that we start with bread. Bread is a simple thing that we all, or certainly most will eat at some point through our lives, and the lucky ones amongst us, may have memories of our mothers homemade bread, with a good spread of butter and homemade jam. I say lucky, but of course that is a subjective view of luck and I fully appreciate that not all mums made bread, I was lucky!

Bread as we most know it these days, from the process of making dough that produces those shop bought, packaged loaves is a very different thing to what I would call Real bread. So, if you’ve been around since this process started in 1961, you’ll know the bread I’m talking about. I’m certainly not going to preach that you shouldn’t eat that type of bread, as I believe around 80% of the bread we eat in the UK is produced that way, and whilst I know that lots of things are added in this bread making process, I’d rather not know about, or not put in my body, I have eaten lots of bread made this way. I could list all the ingredients that go in to that process, but that is not the idea of this blog.

The good thing about Real Bread is the list of ingredients are short enough for a 4 year old to remember, so now when I ask Regan aged 5, she can recall the ingredients we need. Our basic loaf recipe, just like many bread recipes varies little to ones you may have seen or tried before. I’m certainly, not taking credit for coming up with a unique recipe for yummy homemade bread!

Ingredients: 500g Strong Bread Flour; 375ml of Water, 10g yeast, 10g Salt

Method: 500g of strong bread flour, I like to do 400g of strong white bread flour and 100g of strong wholemeal bread flour, but you can switch percentages around as you wish, or do 500g of just one type of flour.

Measure out 375ml of warm water, warm, but not hot. A temperature that you can comfortably put your hand in is about right. To the water we add 10g of dried yeast, and give it a stir. Leaving the water and yeast for 5-10mins I find works best, and it starts to bubble a little.

Add 10g of salt to the flour, keep the salt away from the yeast solution, as it will harm or kill the yeast.

Since, Regan started helping we use a dough mixer to start the kneading process. Ours is a KitchenAid one with a dough hook. We put the flour and salt in the mixing bowl and start it mixing at a slow speed, number 1 setting on the KitchenAid and slowly add the water/yeast solution, Assuming the texture looks right, we then allow the dough hook to knead the dough for 10 minutes. If the dough is too dry, you can add a little more water (being careful not to add too much), or if the dough is too wet add a little more flour taking caution to add small amounts.

Whilst the KitchenAid is kneading the dough, we grease a glass bowl with a small amount of Rapeseed Oil, just enough to stop the dough sticking on its first proof.

Once the initial knead is done by the KitchenAid, we then remove the dough from the bowl and put on a lightly floured work surface to hand knead. There’s not much need for this step, but it allows Regan to practice kneading and gives us both that sense of a more hands-on approach. I couldn’t tell you what difference to taste and texture this last bit makes, as we’ve always done it.

Once, kneaded we put in to the greased bowl and cover it either with a shower cap, or a clean damp tea towel, usually its the shower cap, so we can see it rising. Leave in a warm(ish) place for around a hour.

After the hour, we remove the risen dough on to the work surface, again lightly floured and ‘knock it back’ and by this I mean we gently flatten the dough and shape it ready for the 2nd proof. At this stage we either put it in a greased loaf tin or mostly a floured proofing basket.

At this point I put the oven on high, as high as it’ll go. Because we use a baking stone, we need the stone to be HOT, so whilst the 2nd proof is taking place the baking stone can get really hot. The 2nd proof, takes around 45-60 mins, so plenty of time for it to heat up.

Just before, we put the bread in to the hot oven, I add a scoop or two of ice cubes to the bottom of the oven, on a baking tray, give a little steam, this helps give a nice crust to the bread.

Carefully, empty the dough from the proofing basket on to the hot baking stone and give the top of the bread a slash. If you’re using a loaf tin, slash the top of the proofed bread before putting it in the oven. Scoring or slashing the dough with a blade or a sharp knife is to allow it to expand during baking. The purpose is primarily to control the direction in which the bread will expand during “oven spring.”

Set the timer for 10 mins, then after 10 mins turn the oven down to 180C for another 10-15 mins.

Then the difficult bit… remove from oven, and allow to rest and cool. I say, difficult as the smell makes you want to eat it straightaway! Of course, you will eat a slice or two whilst it is still warm, but do allow 15-20mins as the inside whilst cooling is still cooking.

The initial cut, the crust we share with just butter on… in my opinion there is nothing better!

NB: I do not endorse KitchenAid, or receive any monies from them, we just use one. Other stand mixers are available and can be used. Which ever you choose, get the biggest machine you can afford so you don’t have to do several batches for one recipe.