Chewy Loaf with Fermented Dough

Been too long since added content, although we haven’t stopped making ‘bread with dad’ or any other cooking, but as daughter grows, Gymnastics and Tik Tok does distract but wanted to share the Chewy Loaf with Fermented Dough recipe which is our go to loaf.

Using Fermented Dough (Pate Fermentee) helps lift a normal loaf and gives improved flavour… a firm favourite in our house, and with my now nearly 12 daughter.

It does take a little advance planning initially, but once done first time the process is easier.

Method (Fermented Dough)

100g of strong white bread flour, I use T55 french flour

75ml of warm (not hot) water and add 5g of yeast (we use dried yeast), devolved in the water

5g of salt (add to flour)

Mix the salt and flour and add the water and yeast solution, stir to make a dough and give a short knead, for about a minute. 

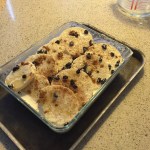
Return the dough to the bowl, cover and put in the fridge, overnight (minimum), or as we do a couple of days if you want a good flavour to your loaf.

Method (Main Dough)

500g of strong flour, we use 400g of the T55 and 100g of spelt flour

375ml of warm (not hot) water and add 5g of yeast (we use dried yeast), devolved in the water

5g of salt (add to flour)

The fermented dough should have risen to around double its size.

In the water and yeast mix, we then whisk in the fermented dough until dispersed.

Add this mixture to the flour and salt, and let knead for around 10 mins, we use a Stand Mixer with dough hook.

Pause for 10 mins and give it another 1 minute knead

Pause for 10 mins and give it another 1 minute knead

Pause for 10 mins and give it another 1 minute knead

Remove the dough from bowl, and shape in to a round and put in bowl covered for around 1 hour.

After the hour, the dough should be risen to top of the bowl around triple original size.

At this point we remove from bowl, and take around a small amount, just over 100g of the dough and put in separate bowl, cover and put in fridge… this is our fermented dough for a few days time, so the next time you make the loaf, your fermented dough is already to use.

By doing this each time, the flavour gets better and better… not, but a bit like sourdough gets better.

The remainder of the dough we lightly knead and shape and put in a round bread banneton proofing basket, dusted with rye flour and cover

Whilst we wait for the 2nd proof (about an hour), we put a baking stone in the oven and put the oven to 225C

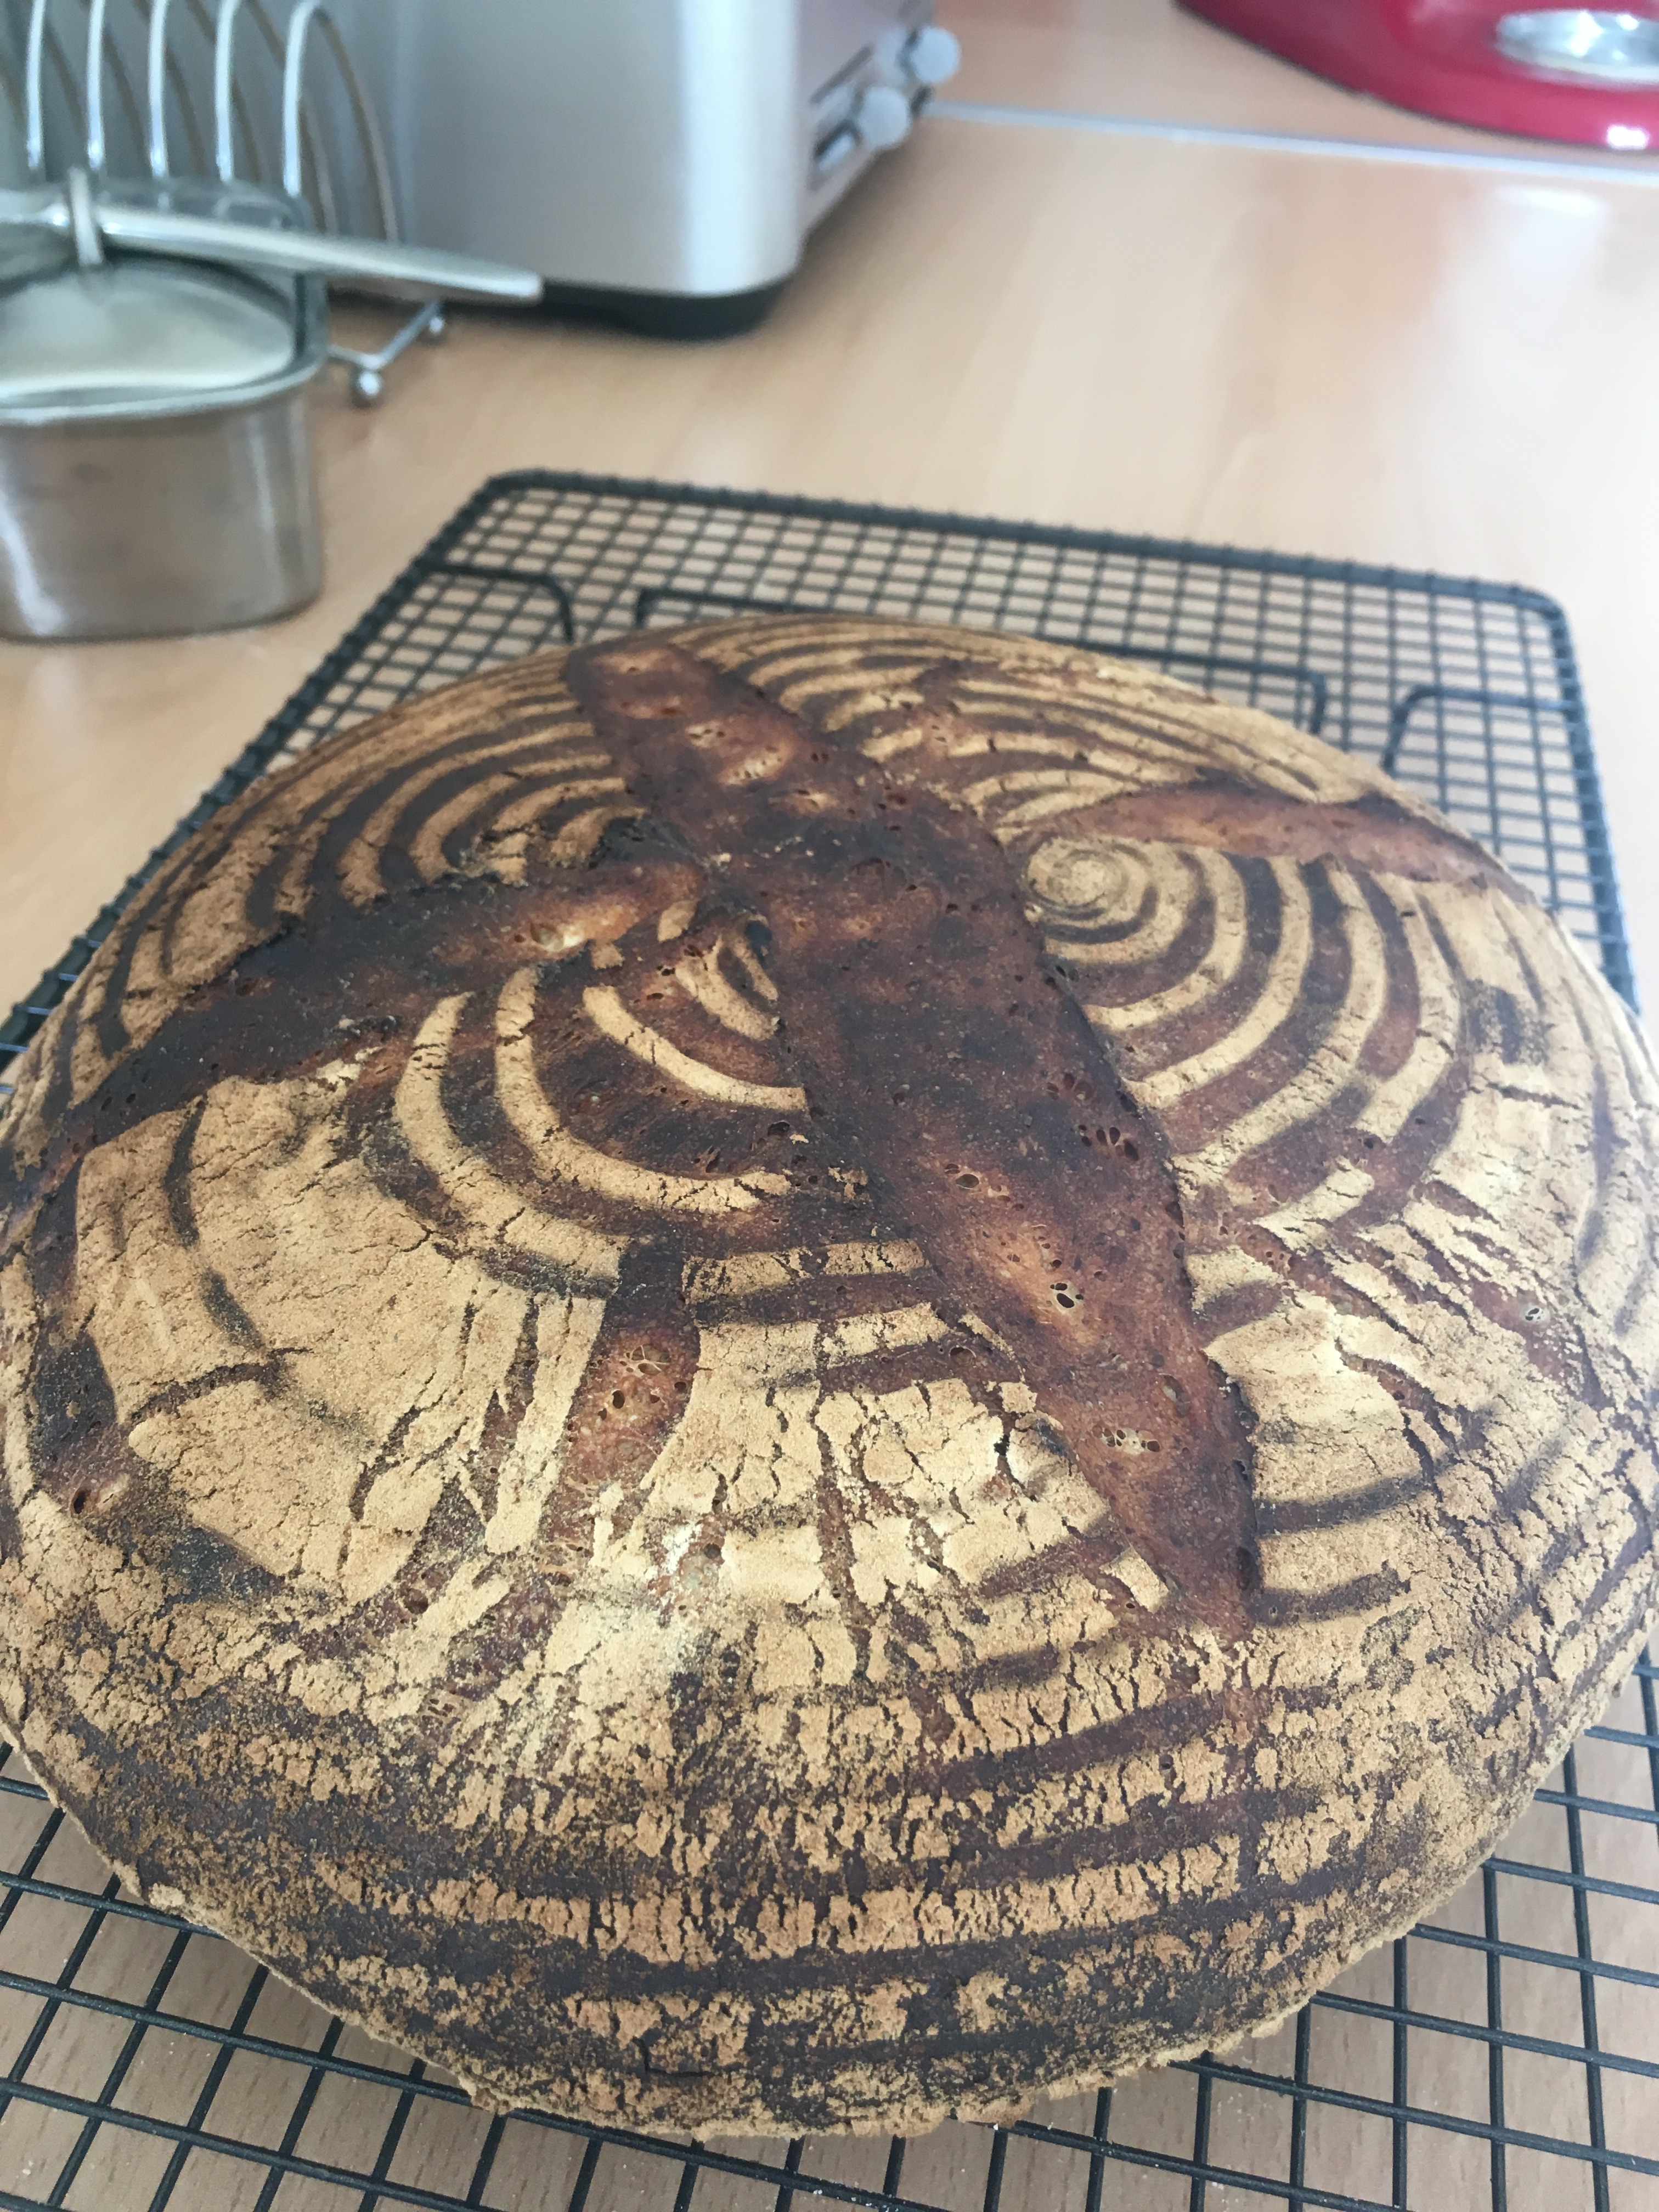
Around an hour later, we turn the dough on to a dusted peal which we use semolina flour mixed with rye flour. 

Score a cross in loaf with a grignette or very sharp knife to control how the loaf expands.

Open oven and slide the loaf on to the baking stone and close door.

Bake for between 35 and 45 mins, remove from oven with peel and put on rack to cool

Once cooled (or maybe still slightly warm), slice and put excess amounts of butter to eat.

Enjoy

Bread (Update)

IMG_0421 2The good thing about Real Bread is the list of ingredients are short enough for a 4-year-old to remember, so now when I ask Regan nearly 9-years old, she can recall the ingredients we need. Our basic loaf recipe, just like many bread recipes varies little to ones you may have seen or tried before. I’m certainly, not taking credit for coming up with a unique recipe for yummy homemade bread!

Ingredients: 500g Strong Bread Flour; 375ml of Water, 10g yeast, 10g Salt

Method: 500g of strong bread flour, I like to do 400g of strong white bread flour and 100g of spelt flour, but you can switch percentages around as you wish, or do 500g of just one type of flour.

We’ve recently started using spelt flour and whilst we do occasionally do a 100% spelt loaf (pictured), using it in a ‘white’ loaf adds something special and tasty. If using spelt flour we add a teaspoon of natural honey into the mix too. Optional of course.

Measure out 375ml of warm water, warm, but not hot. A temperature that you can comfortably put your hand in is about right. To the water we add 10g of dried yeast, and give it a stir. Leaving the water and yeast for 5-10mins I find works best, and it starts to bubble a little.

Add 10g of salt to the flour, keep the salt away from the yeast solution, as it will harm or kill the yeast.

Since, Regan started helping we use a dough mixer to start the kneading process. Ours is a KitchenAid one with a dough hook. We put the flour and salt in the mixing bowl and start it mixing at a slow speed, number 1 setting on the KitchenAid and slowly add the water/yeast solution, Assuming the texture looks right, we then allow the dough hook to knead the dough for 10 minutes. If the dough is too dry, you can add a little more water (being careful not to add too much), or if the dough is too wet add a little more flour taking caution to add small amounts.

Whilst the KitchenAid is kneading the dough, we grease a glass bowl with a small amount of Rapeseed Oil, just enough to stop the dough sticking on its first proof.

Once the initial knead is done by the KitchenAid, we then remove the dough from the bowl and put on a lightly floured work surface to hand knead. There’s not much need for this step, but it allows Regan to practice kneading and gives us both that sense of a more hands-on approach. I couldn’t tell you what difference to taste and texture this last bit makes, as we’ve always done it.

Once, kneaded we put into the greased bowl and cover it either with a shower cap or a clean damp tea towel, usually its the shower cap, so we can see it rising. Leave in a warm(ish) place for around an hour.

After the hour, we remove the risen dough on to the work surface, again lightly floured and ‘knock it back’ and by this I mean we gently flatten the dough and shape it ready for the 2nd proof. At this stage, we either put it in a greased loaf tin or mostly a floured proofing basket.

At this point I put the oven on high, as high as it’ll go. Because we use a baking stone, we need the stone to be HOT, so whilst the 2nd proof is taking place the baking stone can get really hot. The 2nd proof takes around 45-60 mins, so plenty of time for it to heat up.

Just before, we put the bread into the hot oven, I add a scoop or two of ice cubes to the bottom of the oven, on a baking tray, give a little steam, this helps give a nice crust to the bread.

Carefully, empty the dough from the proofing basket on to the hot baking stone and give the top of the bread a slash. If you’re using a loaf tin, slash the top of the proofed bread before putting it in the oven. Scoring or slashing the dough with a blade or a sharp knife is to allow it to expand during baking. The purpose is primarily to control the direction in which the bread will expand during “oven spring.”

Set the timer for 10 mins, then after 10 mins turn the oven down to 180C for another 10-15 mins.

Then the difficult bit… remove from oven, and allow to rest and cool. I say, difficult as the smell makes you want to eat it straight away! Of course, you will eat a slice or two whilst it is still warm, but do allow 15-20mins as the inside whilst cooling is still cooking.

The initial cut, the crust we share with just butter on… in my opinion there is nothing better!

NB: I do not endorse KitchenAid, or receive any monies from them, we just use one. Other stand mixers are available and can be used. Which ever you choose, get the biggest machine you can afford so you don’t have to do several batches for one recipe. 

Christmas Mince Pies

Ok, before we start, can I apologise that I’ve posted this too late to make homemade mincemeat for the ‘best’ mince pies, however this recipe has great pastry and whilst I’m  not a fan of shop bought mincemeat, you can jazz up a shop bought mincemeat and if you’re very lucky you can find a bought one without peel… I’m not a fan of peel in mincemeat!

Unfortunately, most shop bought I’ve seen contains peel.. that said, I find if you put a jar of shop bought mincemeat in a food processor, such as the KitchenAid Classic we use and then add one grated pealed  and cored apple, zest of an orange and zest of a lemon, then one measure of dark rum or brandy. Blend it on pulse, half a dozen times, until the texture is finer, put it back in the jar and leave 24hrs in the fridge.  It won’t be as nice as the homemade one, but it’s not a bad short notice alternative.

Anyway, on to the proper recipe… The pastry is so important on mince pies, and we’ve tried a few variants, but this one works really well, to give the right taste balance.

Ingredients: 225g Plain Flour; large pinch of salt; 2 tablespoons of Icing Sugar; 125g of Unsalted Butter; 1-2 tablespoons of Cold Water

Method:  Sieve the icing sugar, flour and salt into the bowl, add the butter in small chunks and rub in with your finger tips until you have a crumb like consistency. Bind the pastry mix with the 1 to 2 tablespoons of cold water, then lightly knead the mix until you have a smooth dough like texture. 5 year olds need watching here as they can over knead, well Regan as over done this before and we don’t want a black pastry!

Wrap the pastry ball in clingfilm and put in the fridge to rest/chill for at least 30 minutes.

Once rested/chilled we remove from the fridge and roll out on a lightly floured work surface until around 3mm thickness. Grease a muffin/tart tray and cut the bottom of the mince pie rounds and put in the trays. At this point we add the mincemeat and then cut out the tops. We cut out star shapes for the tops, as we don’t want too much pastry to mincemeat.

Give the tops a brush with milk and put in an oven set at 170C for 20 mins. Keep an eye on them as all ovens seem to vary and it may take slightly longer or a little shorter to bake them.

Cool on a wire rack and once cool sieve some icing sugar on top for a light dusting of festive snow. Regan and I them eat one, or maybe two!

The ingredients for the mincemeat, which you can make next year is my mum’s recipe that she got from her mum, so keep the recipe to yourselves, please! The ingredients are in old fashioned ounce rather than grams but you can convert if your scales are grams only.

Mincemeat ingredients: 1/4lb of Sultanas; 1/4lb of Raisins; 1/4lb of Currents; 2 Large Apples, my mum used Bramley Apples, we use the Cox’s we grow on our trees; 4oz Suet (vegetarian suet works well); 6oz of Caster Sugar; 1/2 teaspoon of Mixed Spice; 1 level teaspoon of Nutmeg; 1 tablespoon of Lemon Juice; 180ml of dark rum or brandy.

Method: Put all ingredients in bowl, clingfilm and leave overnight for the fruit to swell in the alcohol. The following day we blend in the KitchenAid Classic on pulse again and then put the mincemeat in to sterilised jars and keep in a cupboard until ready to use. My mum always made the mincemeat just after Halloween, but in recent years we’ve done it early November which tastes good too, but you need to make it early enough so pick a time that suits you but i’d say at least 4 weeks before you plan to use it.

NB: As on previous blog posts, you can choose to use any food processor and we don’t endorse any mentioned. Enjoy your Christmas and look out for more blog posts on ‘Bread with Dad’ in the New Year.

English Muffins

Yes, I know Sunday’s are a morning for a lay-in… well they used to be before we had our daughter!

Getting woken around 7am each weekend morning… strange that on weekdays/school days we have to wake her up??

Homemade English Muffins aren’t too time-consuming so if you do get woken up at 7am like me, you can have fresh Muffins on the breakfast table for 8.30am maybe 9am at the outside.

Ingredients:

450g Strong Bread Flour; Pinch of Salt; 30g of Butter; 10g of Sugar; 300ml Milk; 7g of Dried Yeast

Method:

Put the butter in to a pan and gently melt the butter, add the milk and sugar and gently warm the liquid through, ensuring you only warm and not heat the liquid. Not that we allow Regan to do this bit, but a good tip is to circle your finger in the liquid as it is warming on a low heat and you’ll know when it is warm. Add the yeast and stir in and leave for 5 mins.

Weigh the flour in to a bowl and add the salt. We use a KitchenAid mixer to knead the dough, so with the flour in the bowl we add the liquid and let the machine knead for 10 minutes.

Remove the dough and put in a lightly oiled bowl and cover the dough and leave for 3/4 of an hour. After, this you are ready to cut out the Muffins.

Start warming a non-stick pan whilst you cut the Muffins out of the dough.

Sprinkle a generous dusting of cornmeal/ semolina on the work surface and gently stretch out the dough getting the depth as even as possible, around 2cm is perfect. Dust the top of the dough with cornmeal/ semolina and then using a round cutter we cut out the muffins.

Place using a flat spatula or palette knife in to the heated pan and dry fry them 5 mins each side, turning twice…. so they get 10 mins each side.

Leave to cool slightly, and break open rather than cut them and enjoy with butter, or maybe hollandaise and a poached egg.

Today, we had butter along with bacon and poached eggs…. yum!!

Our ‘Hobnob’ type biscuits

Making biscuits is an easy and fun way to fill an hour with your children, and you can be certain what goes into them.

Not unusually, I can’t remember where we got this recipe from but I’d suspect it’s pretty generic.

Ingredients:

225g Self-Raising Flour; 225g Sugar; 225g Porridge Oats; 225g Butter; 1 tbsp Golden Syrup; 1 tbsp of hot water; 1/2 tsp Bicarbonate of Soda

Method:

We carefully melt the butter, syrup and water in a pan on a low heat. You want to melt the butter not burn it so keep an eye on it.  Whilst, melting the butter, syrup and water, mix the flour, oats and sugar in a large bowl. You can add extra ingredients if you wish at this point and sometimes we’ll add raisins.

Once the butter etc has melted add the bicarbonate of soda to it, then add the this to the dry mix and mix well with a wooden spoon ensuring it is all mixed well.

We then make balls around the size of a golf ball, maybe slightly smaller and place on a tray (we use greaseproof paper) and we get between 24 and 30 ‘golf balls’ (see pic).

Bake in a preheated oven at 180C for 10-15 mins, they should be golden brown.. as you can see from (picture below) we’ve done some at 10 mins and some left in a little longer.

Leave to cool on a wire tray for a few minutes then eat at least two and tray and save the rest to share with family or friends… perfect with a cup of tea. Enjoy!


Italian (style) Meatballs

Before I record our Italian (style) Meatballs, today Regan cracked her first egg, WITHOUT having to pick shell out afterwards. Something both of us was very pleased to see.

I’ve added ‘style’ in brackets as whilst these meatballs share much in common with those you get in Italy, we do them slightly, very slightly differently.

This recipe is for the Meatballs only, but we do like to serve them with a simple tomato, garlic and basil sauce, and the tomatoes you get from the markets when we’re in France are wonderful to make the sauce from and of course to eat just as they are.

We always make a decent batch of meatballs, and freeze some, so you can make a smaller batch if you wish, just divide the quantities accordingly. We usually make around 32 meatballs and freeze them in batches.

Meatball Ingredients:

700g of Pork (Shoulder works well); 300g of Beef (Skirt or flank is good). I always find it works best if the beef is lean and the pork has some fat.

2 tablespoons of Oregano (we grow and chop our own fresh this time of year, but wild Oregano dried works well); 1 Large bulb of garlic1 teaspoon of salt and 1 teaspoon of black pepper; 1 tablespoon of grated parmesan cheese; 2 teaspoons of parsley (again fresh or dried works well) and 1 large egg.

Method:

We use a mincer to mince the pork and beef through a number 6 plate. Then grate the garlic (chopping word well too, but grating gives a more intense garlic flavour) and add to the mince. Add the salt, pepper and oregano and work through with your hands to mix well (Regan’s favourite part). Once mixed together add the egg and the parsley and work through the mix the same as before.

Rest in the fridge in the bowl covered in clingfilm for around an hour, longer is ok, but try and leave for an hour.

We then try a little of the mixture just to make sure the balance/taste is ok. make a small hamburger type patty and fry off in a pan. Assuming it tastes good, them we’re ready to make the meatballs. Sometimes it may need a few more herbs or a little more garlic. Some meatball recipes i’ve seen include breadcrumbs, but the only time we add breadcrumbs is if the mixture is too moist.

To make the meatballs we keep things simple, but you could weigh each meatball to get them perfectly equal in size. We divide the mixture roughly in to 4 and then roll 4 long sausages out on a lightly floured work surface. We then divide each ‘sausage’ into 8.

Again with your hand lightly floured (if you put a small heap of flour in the corner of your work top, or in a bowl and simply dab your flat hands in the flour, then brush your hands together, you’ll have lightly dusted hands).

To make the meatball, place the piece of the mixture on one palm, and with the other palm  do a firm circular motion to make a ball. Apologies if that sounds basic and obvious, but sometimes because I’m cooking with our soon to be six year old I forgot that some will know this. Regan loves making the ball shapes and is very skilled at doing this now.

We put aside the ones we will eat today and the rest we lay out on a baking sheet, lightly greased and put in the freezer for around an hour. This stops them sticking together in a freezer bag. After the hour, put them in a freezer bag and return to the freezer and they’ll be ready to use for a easy midweek tea.

Like I said earlier we like them with a nice tomato, garlic and basil sauce, so we are mixing oregano, parsley and basil together which in my opinion works really well… in reality the predominant flavour is the pork, beef, oregano and garlic, but parsley always goes well with garlic at any time, doesn’t it.

We also serve it with garlic bread, a nice french baguette with our home made garlic and parsley butter… yum!

Pasta

Ok, before I type up mine and Regan’s adventure with homemade pasta, let me just get it out the way… Pasta generally for us and I’m sure many others, is a quick mid-week tea/dinner and knocking up homemade pasta is generally an unnecessary step too far, especially with the mass variety of dried and ‘fresh’ pasta available in the shops.

However, ‘bread with dad’ is about having fun in the kitchen and giving Regan skills that may (or may not) be useful in her adult life, AND homemade pasta does taste extremely nice and the Fettuccine “little ribbons” we make are great to go with a homemade ragù or a simple arrabbiata.

For this pasta, we had a little extra help, with Regan bringing home ‘Paddington Bear’ from school for an adventure her class can talk about next week, and whilst he didn’t get his ‘hands dirty’ he did sit nicely observing the method.

Ingredients: 300g of ’00’ flour; 3 medium eggs; 1 egg yolk from a 4th egg; a pinch of salt.

Method: After weighing out the ’00’ flour we empty carefully on to a clean work surface and make a well in the middle. We then add the 3 whole eggs and an extra egg yolk in to the centre, and add a pinch of salt.

With two forks, gently mix the eggs together and start to bring the flour into the centre and mix in to the eggs. Keep doing this until the pasta dough looks ready to get your hands in.

Dust your hands lightly with the ’00’ flour and start to knead the dough. We’re going to knead the pasta dough for around 10 mins, so Regan and I take it in turns, Regan doing a superficial job of folding and kneading, whilst Dad does the heavy kneading. As we knead, it becomes easier and Regan can get some pressure on the kneading process, but in the early stages it’s hard going versus making bread dough!

Once kneaded, we wrap in cling film and place in the fridge for around 30 minutes.

Now, to make the Fettuccine… We use a pasta machine. an inexpensive one which works well, but you can choose bigger and better ones.

Starting on the the largest setting we put through the machine, 10 times, folding and putting back through, before reducing the settings one by one until we have the required thickness of pasta dough.

Because we are making Fettuccine we start to cut the dough in to lengths once the dough gets thinner, and because if we didn’t the past dough would be the length of our kitchen! We try and keep the length of the pasta dough to 30cm, so keep cutting when the dough passes that length. You don’t need to do this, but it makes it easier to handle, especially for a 5 year old and her Dad. You can keep lightly dusting the dough with the ’00’ flour to stop it sticking.

Once thin enough, we are ready to put it through the cutter, to make the tiny ribbons. Passing it through the machine cutters is straightforward and Regan likes to wind the machine handle whilst I guide the ribbons and toss them gently in the ’00’ flour.

Because we are going to use the Fettuccine straightaway, we just lay a damp tea towel over the ribbons to stop drying out. They’re only going to take 2-3 minutes to cook in boiling water, so once your ragù or a simple arrabbiata is ready you can cook the pasta, toss through the sauce and serve.

We serve with our homemade garlic bread and homemade garlic butter.

Paddington however, decided on Marmalade Sandwiches and not our Fettuccine! He needs to be more adventurous with his diet!!

Brioche Buns for Sausage Butties

After our Lincolnshire Sausages, the other week and in particular my tease on mine and Regan’s Brioche Buns, for our take on a Sausage Butty, we’ve spent the morning making Brioche Buns, and the Tomato and Onion Relish to have with the Lincolnshire Sausage Patties we made last week. We vacuum packed and froze the sausage patties to ensure they kept well (remember, no additives or preservatives as such). I know some will be saying salt is a preservative, but you know what I mean.

If you’ve tried our Bread recipe, making Brioche won’t be an alien process, the ingredients and method are slightly different, but lots of similarities too. Regan likes making Brioche, as there are more ingredients, whilst I prefer the simplicity of proper bread with just flour, water, yeast and salt.

Ingredients: 500g of Strong Bread Flour; 125ml Warm Milk; 10g of Dried Yeast; 10g of Salt; 200g of Softened Butter Cubed; 2 Medium Eggs; 50g Caster Sugar. You’ll also need, another Egg for the glaze.

Method: Again, as with all the recipes I do with Regan, we weigh out everything before we start, a great opportunity for her to practice her maths. Once, weighed out we mix the yeast in to the warmed milk, the milk should be lukewarm, and not hot. Whilst we wait for the milk/yeast to bubble a little, we put the flour, salt and sugar in to the mixing bowl and give it a gentle mix through. Remember we use the KitchenAid mixer with dough hook, but this can be done by hand, although the Brioche dough is much more sticky, so I find it too messy when doing it with Regan, despite her enjoying getting in to a mess!

After the milk and yeast start to bubble, add to the bowl with the flour/salt and sugar, keeping the dough mixer on a low setting. We then add the eggs to the mix, closely followed by the butter in small chunks a bit at a time, to ensure the butter is well incorporated. We do find we have to switch off the mixer occasionally throughout this process to scrape the sides of the bowl.  Once the butter looks to have been incorporated in to the mix, we turn the mixer up to medium for 5 mins and then down to low again for another 5 mins.

We then empty the dough in to a greased bowl and cover with a shower cap or clean damp tea towel for an hour, I say an hour, but there are times this dough has taken longer, so be patient and allow it to at least double in size. We’ve found unlike with our proper bread recipe, you do need to use a dough scraper of spatular to get the dough mix in to the greased bowl. Like I said earlier the dough is much more sticky. The dough should have an elastic feel to it, by which I mean it’ll stretch rather than pull apart.

After the hour (maybe longer), the dough just like our usual bread will have risen and we need to shape it in to buns. Dust the work surface and your hands with flour and tip the brioche dough on to the work surface and knead and shape in to a long sausage shape, this is the bit Regan enjoys most it seems. We then cut equally and weigh each piece before shaping in to the buns, place on a baking tray lined with parchment, we get 12 good sized buns from the dough. Cover with a clean tea towel for the 2nd proof. This takes another hour. Put the oven on to it’s highest setting, to ensure it is hot and to temperature.

Whilst, we’re waiting for the 2nd proof we make the Tomato and Onion Relish, which can be served warm or cold on your ‘Sausage Butty’ I prefer it cold, but the wife and Regan like it warm with Stilton Cheese crumbled on top, which melts slightly into the relish.

Ingredients: 4 Large tomatoes, skinned and chopped; 1 small or half a large Red Onion; 1 Garlic clove, crushed; 2 tablespoons of Rapeseed Oil; Pinch of Sugar; Salt and Pepper to taste.

Method: We start the onions off in the oil, just so they start to get a little translucent, we keep the onions in half rings so they’re chunky. We then add the tomatoes, salt and pepper, sugar and garlic and simmer for around 15 minutes. I sometimes split a small red chilli just to add something different, again that is down to your taste. Once cooked I put in a jar, seal the lid and tip it upside down to create a vacuum seal. We are not keeping this long, it pretty much goes with one serving across the family, but I’m sure it would keep longer if you wanted.

Now, don’t get me wrong, this tasty take on a sausage butty is very nice, extremely nice even, but there are times when either shop bought branded ketchup or brown sauce is preferred and both work really well, or sometimes we do the sausage patties in the brioche buns with a fried egg, but I still recommend going this homemade relish route.

Once the relish is made and a quick tidy up, the brioche buns are ready to go in the oven. Regan gives them a glaze with egg wash, not always as neat as I would like, but it doesn’t change the taste, and we follow the same method in the oven as for our normal bread. A few ice cubes in the bottom of the oven on a tray, and cook the brioche buns for 10 minutes at a high temperature, this will give a nice crunch to the top of the bun. Turn the oven down to 180C and cook for another 8-10 minutes, or until golden brown. Place to cool on a wire rack.

If you’re planning to eat these whilst warm (which I recommend), fry off your Lincolnshire Sausage patties whilst the brioche buns are cooling. If you’re eating them later, these buns are great lightly toasted too.

As always, let me know how you get on.

IMG_5496IMG_5495IMG_5503

Bread and Butter Pudding

Mine and Regan’s Bread and Butter Pudding is very much a leftovers dish. Well, to be honest as long as you don’t tell Lisa (the wife), it’s technically a purposeful leftovers dish.

Every time we make bread, which is at least twice a week and because our bread only contains Flour, Water, Yeast and Salt, and therefore it is best consumed the same day as making, we always have a piece left the equivalent of two, maybe three slices. Let me add, that sometimes, probably mostly, greed takes over and there is no bread left!

On those days we are not overly greedy, we always put the small piece left at the end of the day, in to the freezer, which means every few weeks we get to make something with the leftovers. Every couple of months it is our homemade Bread and Butter Pudding that gets made. The rest of the time, we use the leftover bread to make breadcrumbs… breadcrumbs for our sausages perhaps, or maybe to coat our chicken kiev or my favourite sprinkled on the Sunday’s cauliflower cheese!

This is our Bread and Butter Pudding recipe:

Ingredients: The equivalent of 5 slices of bread; 25g slightly salted butter, softened for buttering the bread plus extra for greasing the dish; 125ml of full fat milk; 150ml of double cream; 50g of sultanas or currants (or both); 2 whole eggs and 1 egg yolk; 2 tablespoons of caster sugar for the ‘custard’ and 1 tablespoon of demerara sugar for the top; 1 teaspoon of vanilla essence or 1 vanilla pod, halved and seeds scraped out; zest of half a lemon.

Method: Lightly butter an ovenproof dish we use one 22cm x 17cm x 6cm. Cut the crusts from the bread and then butter both sides of the bread and cut into similar sizes. I slice the bread with the very sharp bread knife and Regan cuts the crusts off with a less sharp knife.

If you’re using bread that is similar sizes it is easier, ours is a bit more ad-hoc as we are using some bread from a tin loaf, and some from a boule type loaf.  Lay half of the bread slices in the bottom of the dish so that they are slightly overlapping. Mix the dried fruit with the lemon zest and sprinkle half of the mix over the bread. Layer the rest of the bread on top then sprinkle over the remaining fruit.

To make the custard, heat the milk, cream together in a saucepan to just below boiling point. Whisk the eggs and yolk with the caster sugar in a jug. Slowly pour the warm milk mixture over the eggs, stirring constantly. Stir in the vanilla extract now if using.

Pour the custard over the bread and leave to soak for at least 30 mins, or longer in the fridge, if you like. Sprinkle over the demerara sugar just before putting in to the oven preheated to 180C/160C for 35-40 mins or until golden brown.

Serve on it’s own or with single cream, or maybe hot custard (my favourite).

Lamb Burgers

Our Lamb Burgers with rosemary and roasted garlic are a household favourite on the homemade ciabatta rolls.

You may have guessed by now Regan likes using the mincer (carefully and fully supervised, of course), so whilst you could just buy Lamb mince, we like to make the burgers with Lamb neck fillets, but any Lamb with a little (not too much) fat works well.

Ingredients: 500g of Lamb (minced); 2-3 cloves of Garlic (roasted); 2-3 stems off a Rosemary Bush; Salt and Pepper; 1 small egg (to bind).

Method: Before I go in to the main method of making these burgers, let me just say about the roasted garlic. You can roast just 2-3 cloves of garlic but we prefer to do a whole bulb and use the remaining cloves we’ve roasted to make our garlic butter. Having garlic butter in the fridge for Garlic Bread, or maybe chicken kiev type mid-week tea is always handy.

Anyway, back to the method. We mince the lamb using our mincer, in to a bowl and squeeze 2-3 of the roasted garlic cloves on to the lamb. Chop the rosemary and add to the bowl, add the salt and pepper (to taste). Regan then gets her hand in to the mixture ensuring the rosemary, garlic and lamb are well mixed. We then add the egg, mix together again, cover the bowl with clingfilm and put in the fridge whilst we make the ciabatta rolls. To make the burgers, we shape the lamb in to balls, equally to get 6 Lamb Burgers and use the burger press . Because the Ciabatta rolls are square, well sometimes they are square,  you could shape the burgers in to squares if you wanted and square burger presses are available for those who wish to do this.

The Ciabatta rolls work well with the lamb burgers, but you could make soft rolls, the brioche buns or even flatbread if you prefer.

Ingredients: 500g strong white bread flour; 10g salt; 10g dried yeast; 400ml of (lukewarm) water; 40ml of olive oil; cornmeal and flour for dusting.

Method: Making Ciabatta is a little different to our normal bread method, and the dough is a lot wetter, so using a stand mixer works best. We handle this dough much less than our normal bread, in fact we handle it hardly at all, it is STICKY.

We follow the same steps as our usual dough, add the flour and salt to the mixing bowl and mix the yeast with the water. Start the mixer on slow speed and add the olive oil to the flour and salt and then slowly add the water and yeast mix. Let the mixer knead the dough for another 10 mins.

Rather than our usual greased bowl for the proofing of the dough we put the dough to rise in a greased square or rectangle container about 3-litre in size. We leave the dough covered with a clean, damp tea towel for longer than normal, around 2 hours. we are looking for at least double, even treble the size on this proof.

Dust the work surface with a mix of flour and cornmeal (50/50) and carefully tip the dough out on to the dusted surface. The dough will still be wet so we are handling it much less and we want to keep the air in the dough not knock it back as per usual. Dust the top of the dough with the cornmeal and divide the dough with a sharp knife in to squares equally.

Place the ciabatta squares on a greased and dusted baking tray, and redust the top with the cornmeal and flour mix. Leave to rest for 10-15 mins and then bake in a HOT oven at 220C for around 20 mins or until golden brown. If you tap the bottom of the buns they’ll sound hollow if done. Cool on a wire rack. Don’t be too worried on shape of the ciabatta buns, especially if baking with a 5 year old, the important thing is the taste.

We serve the burgers with either Lisa’s (the wife) homemade tzatziki or our tomato relish with shavings of feta cheese.

Usual Notes: All done in a simple domestic kitchen and any equipment used is purely through personal choice and not any endorsement.